

 Windows 11
 Windows 10
 Windows 8
 Windows 7
 Windows XP
 Microsoft 365
 Office 2019
 Office 2013
 Project 2021
 Project 2019
 Project 2016
 Visio 2021
 Visio 2019
 Visio 2016
 Server 2008
 SQL Server
 Avast
Avast Utility & Tools
 PDF Editor
 CAD & 3D, 2D
 Graphics/Drawing
How To Install Microsoft Office 365 Apps For Mac Os On Your Mac

This guide will go through the procedure of installing Office 365 software (OneDrive, Excel, Word, Powerpoint and more) on to your personal Mac device. ‘
Required
- Apple macOS Sierra 10.13.6 or later device with an active Internet Connection
- Valid Unimail/Student Account
- Please note that this is for STUDENTS ONLY
NOTE: This installation guide has been created using macOS Catalina 10.15. Certain steps and visual elements may vary on older version of macOS.
Procedure
1. Log into UDO and click the Office 365 tile; alternatively access the Office portal directly by going to office.com

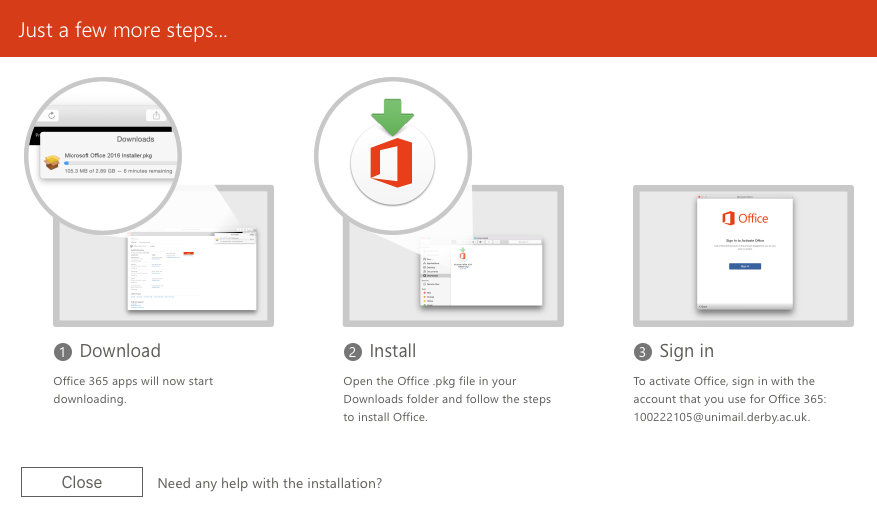
2. You will be redirected to the Office 365 pages, click Install Office Apps > Office

3. Office 365 Pro Plus for macOS installer should start to download automatically, otherwise you may be prompted to allow the download to start:
4. In Safari, a download window can be used to track current progress of the file download
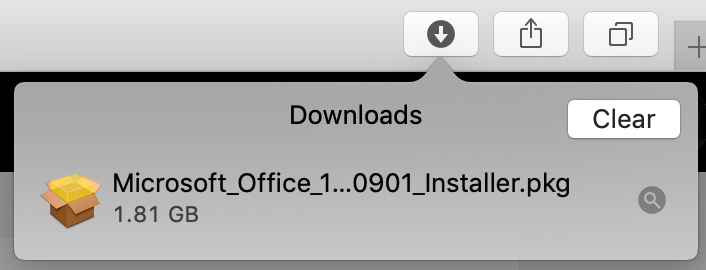
5. Once download has completed, navigate your Mac using Finder to allocate your downloaded file. Files downloaded using Safari are saved in Downloads by default. Double click on the package to start the installation
6. A new Finder view will open presenting you with Installation Wizard
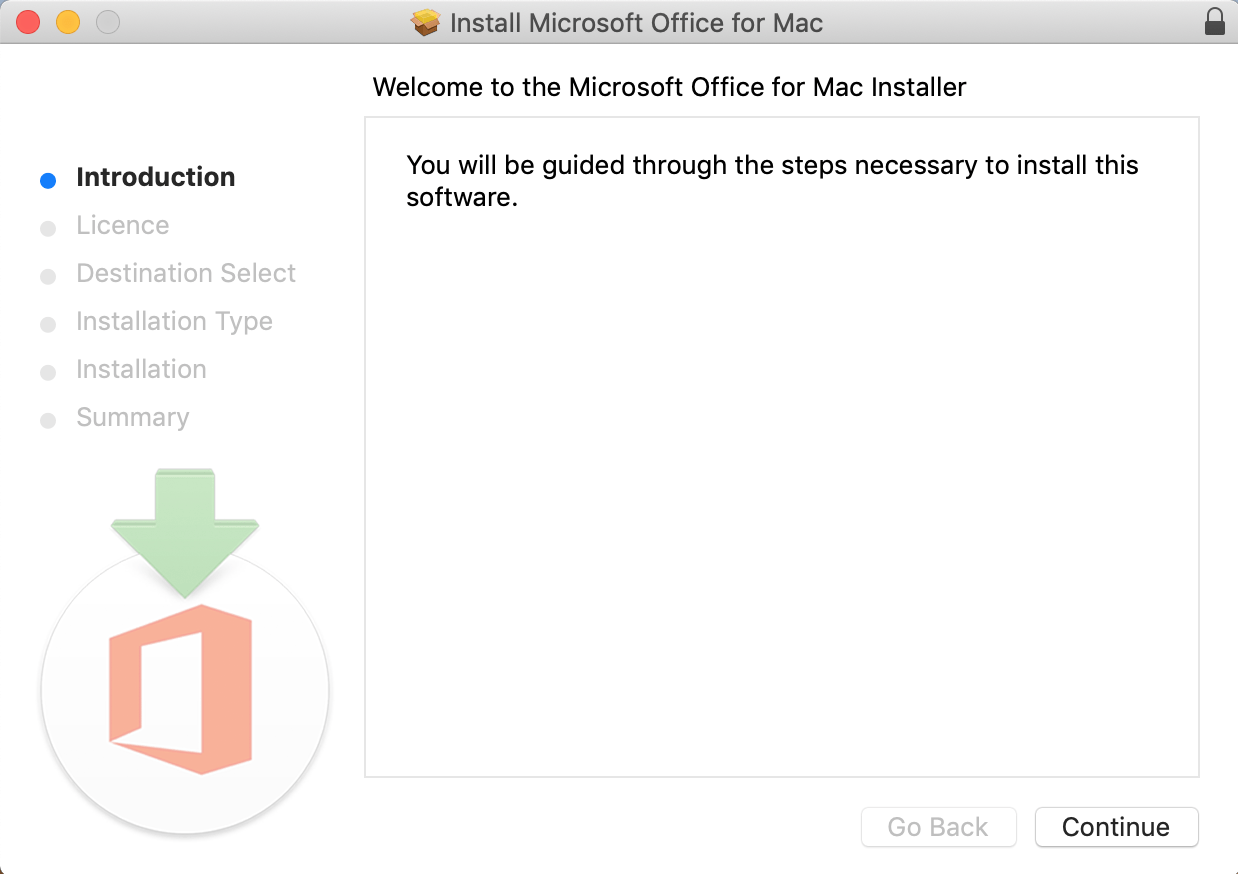
7. Click Continue
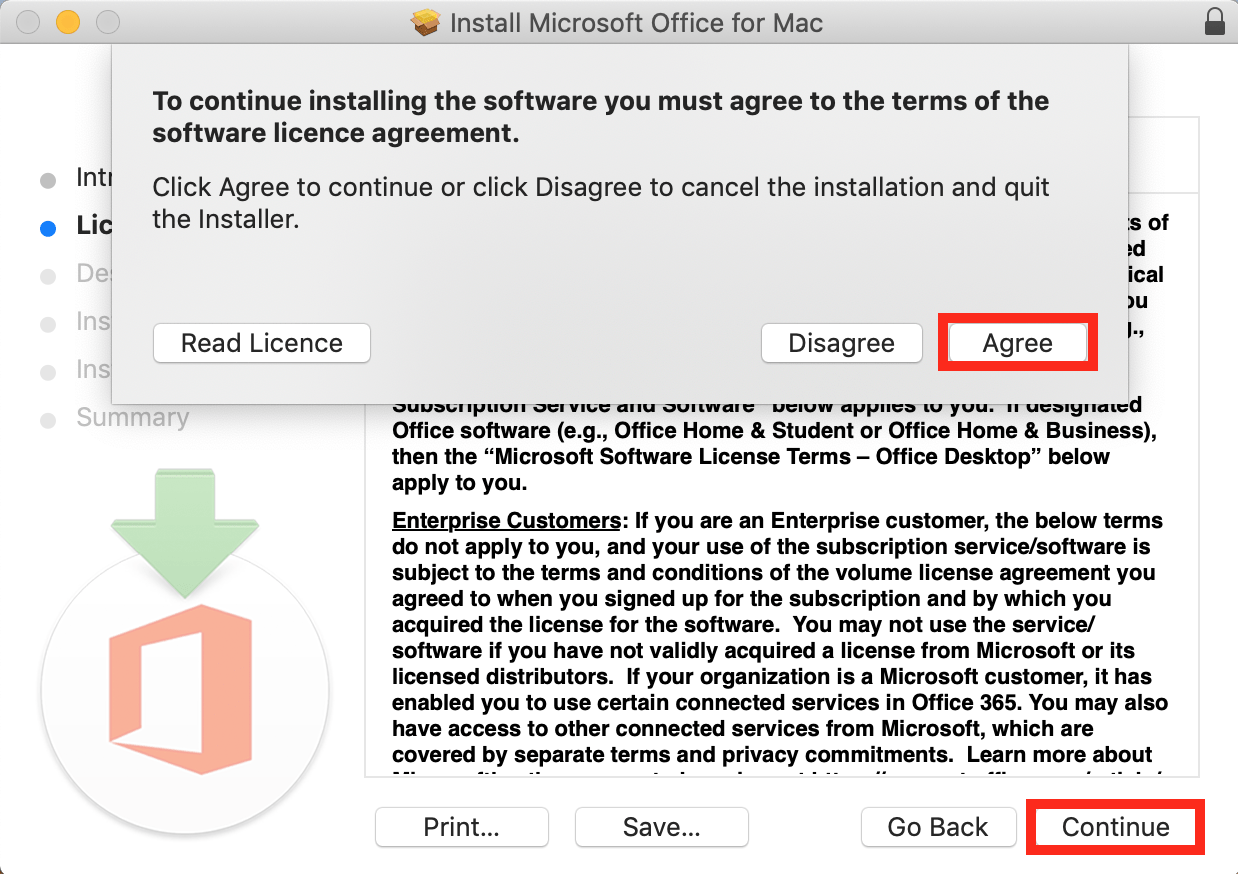
8. You will be prompted to agree to Terms and Conditions. Once you have finished reading, click Agree to Continue. Should you disagree with the Terms and Conditions, click Disagree, and exit the Installation Wizard
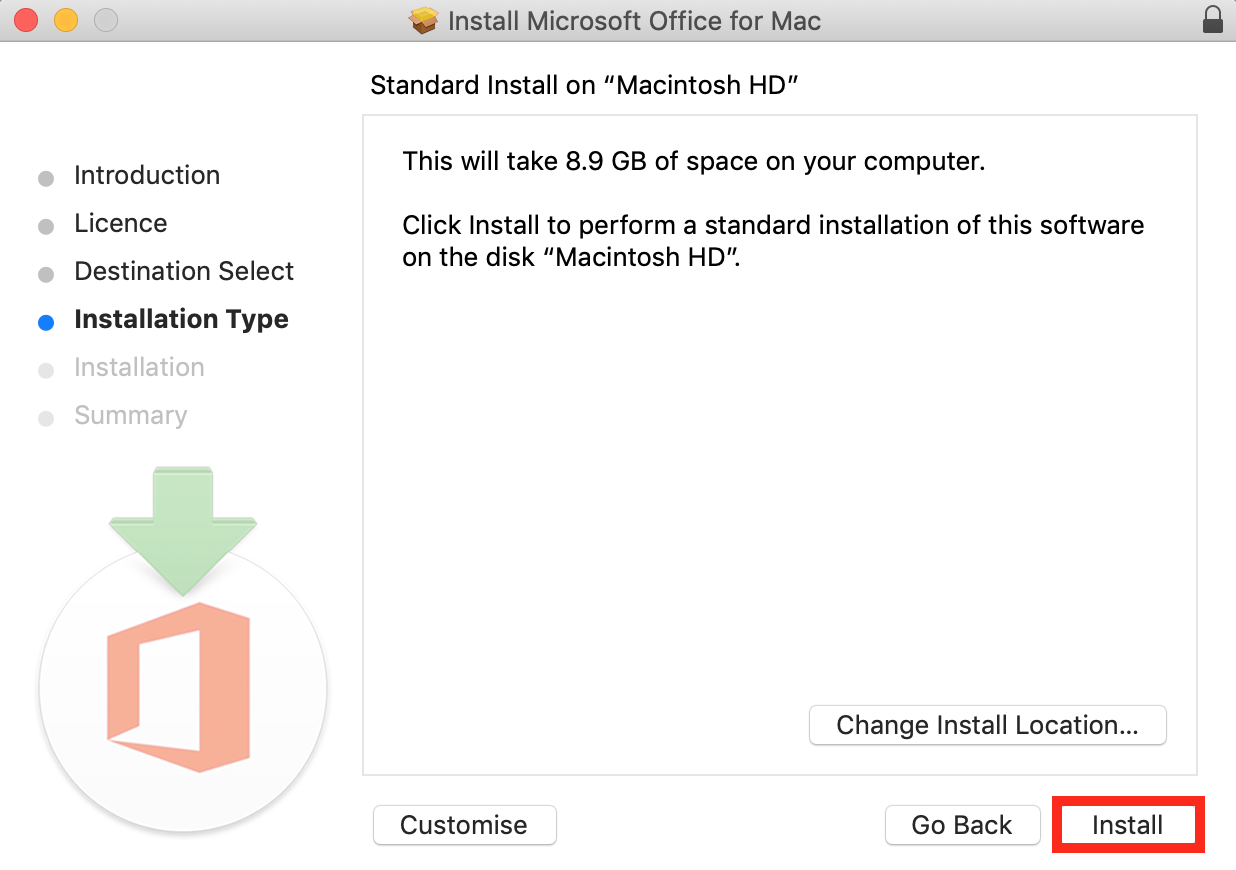
9. Click Install
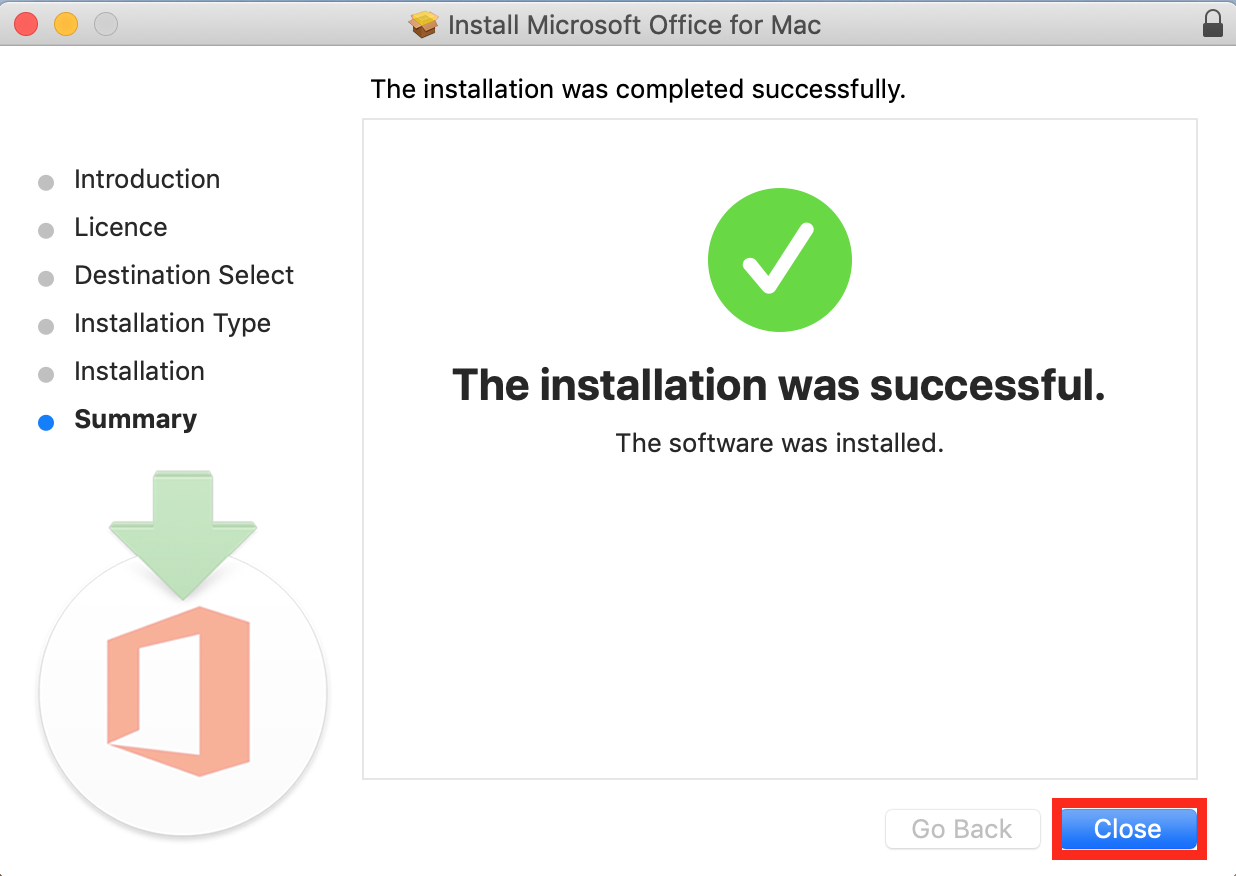
10. Microsoft Office for Mac should now start installing. Once completed, click Close to exit the Installation Wizard
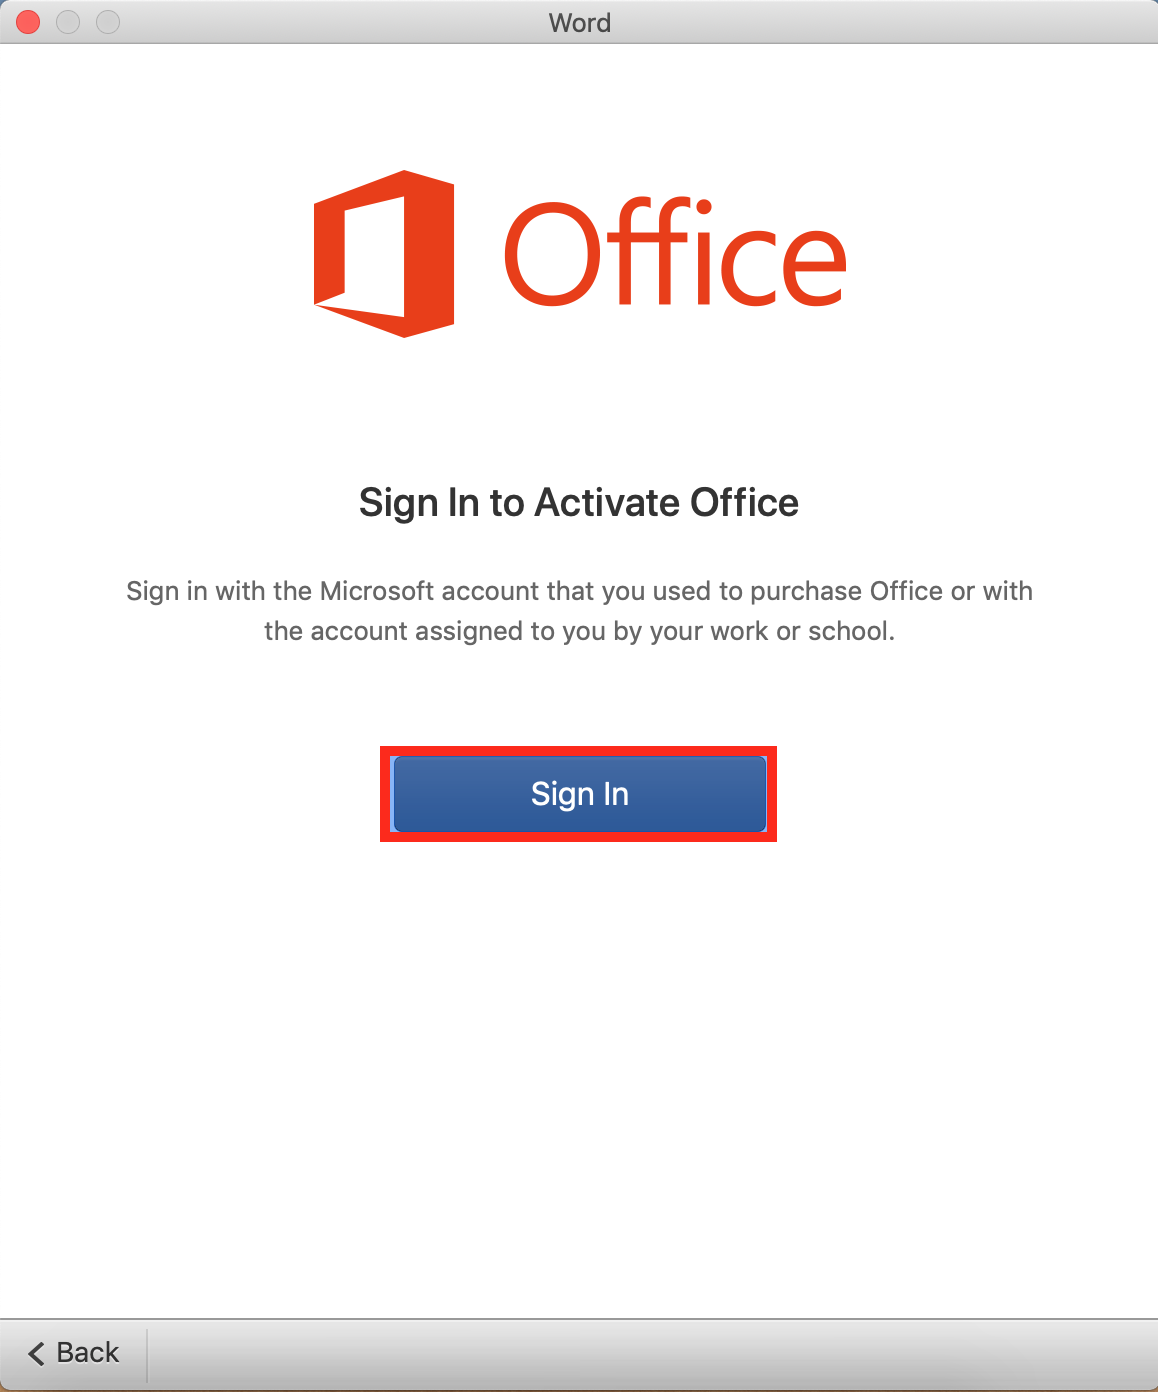
11. Once you attempt to launch any of the Microsoft Office Applications, you will be prompted to activate the software. From the Activation Wizard screen, choose Sign in to an existing Office 365 subscription when prompted:
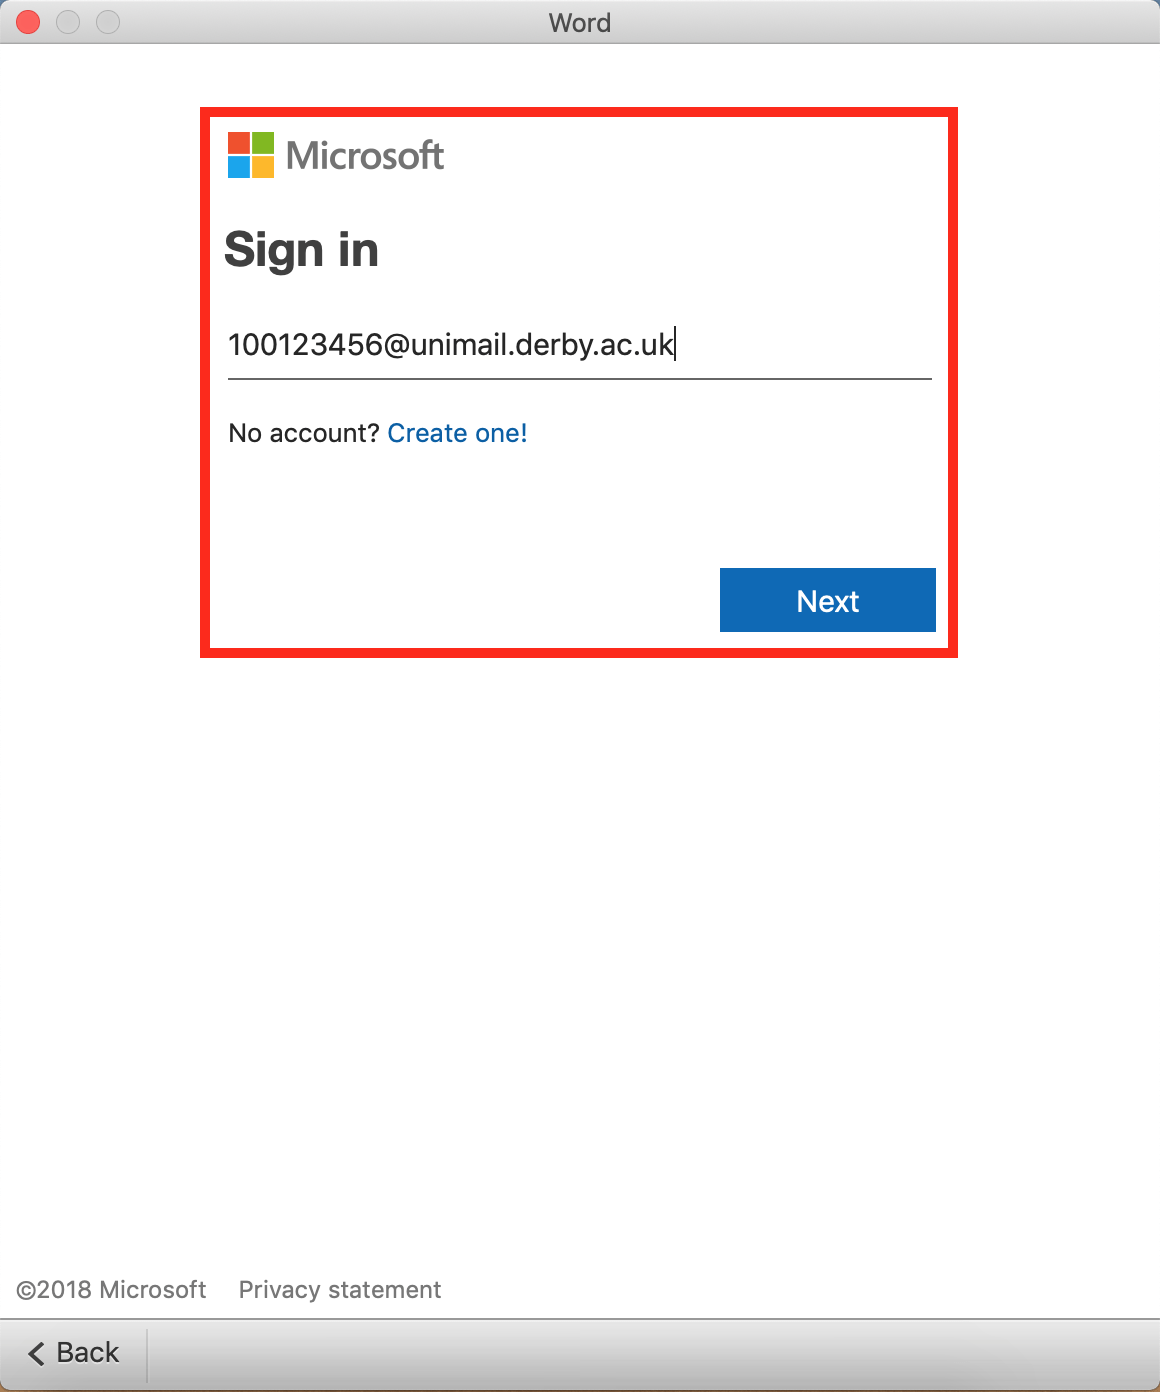
12. Enter your University email address in the following format (NOTE: Enter you own student ID, as the one used in this example is for illustration purposes only!)
13. Enter your password;

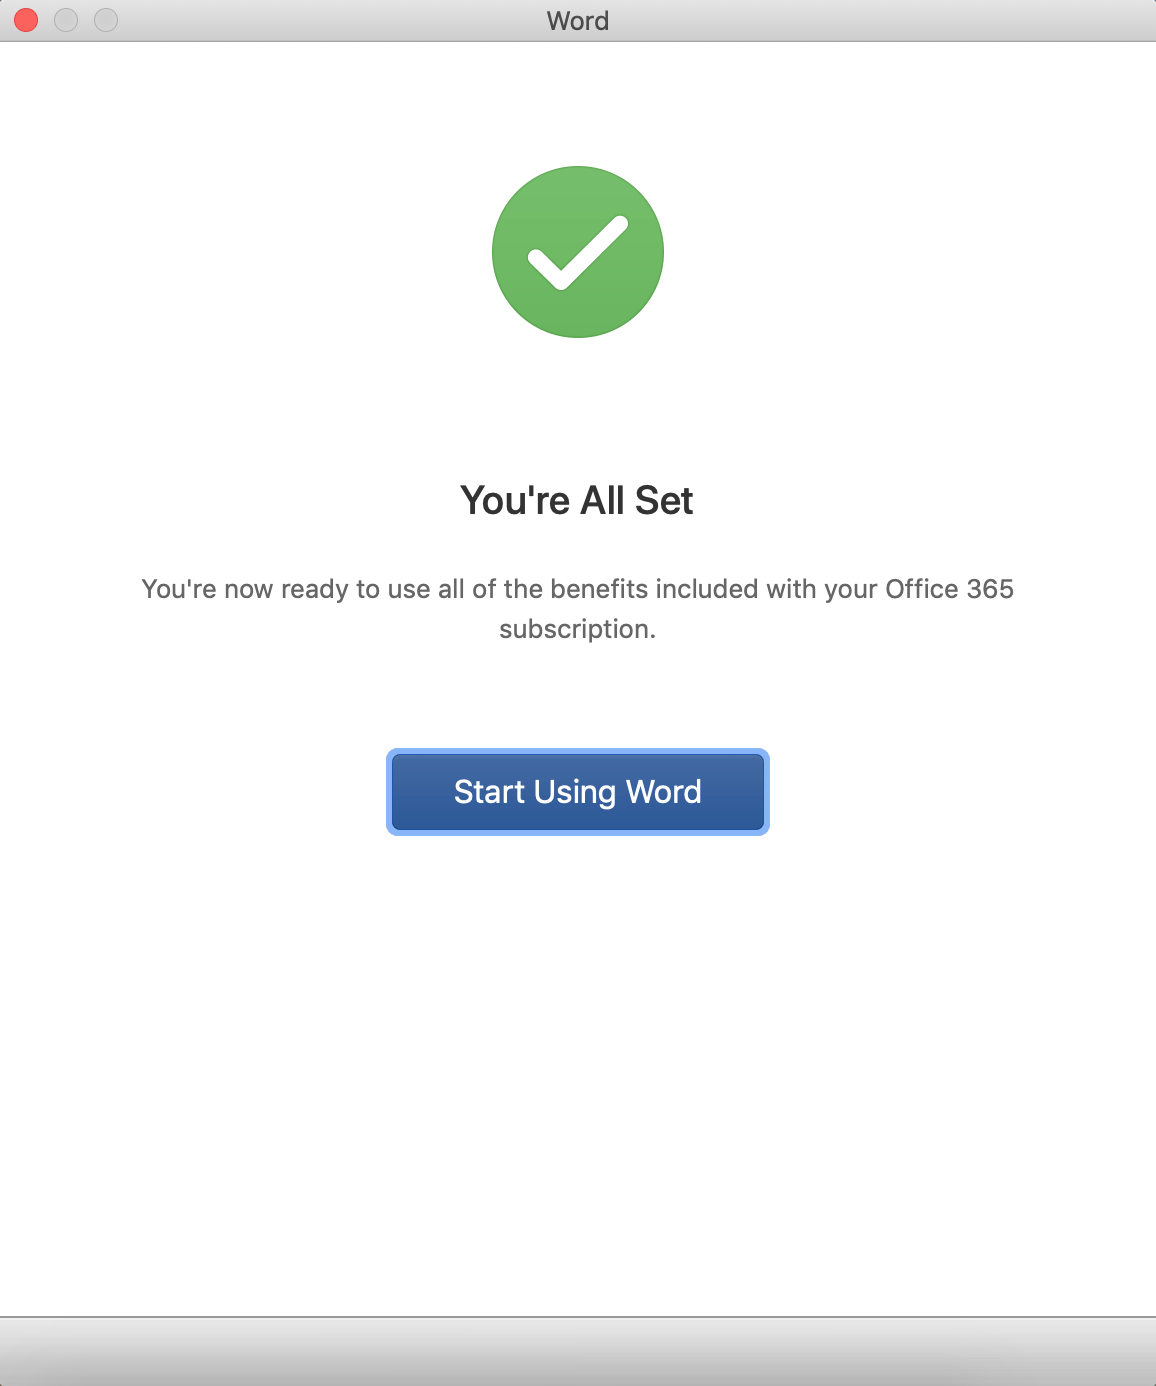
14. Microsoft Will attempt to activate your Office for Mac Software. Once activation has been successful, you should see the following screen. Click Close to exit the Activation Wizard

To verify successful activation of the product, revisit the Software settings using your Unimail Page. There you will be able to manage your installs. Should you buy a new Mac or a PC, you can Deactivate old activations to regain install slots.
NOTE: You are eligible for up to five total installation of Microsoft Office.
You have successfully installed Microsoft Office for Mac.

 Microsoft 365
 Office 2021
 Office 2019
 Office 2013
 Server
